
Table of Contents
Programming Guide
This guide will show you how to setup, program, or reset your smart lock.
If you are looking to install your lock, visit here.
If you are looking for instructions on how to replace the batteries, visit here.
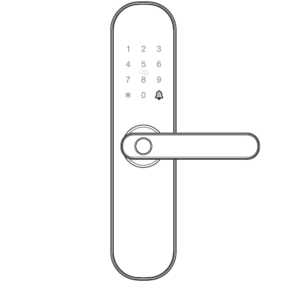
Using The Lock
Add the administrator (the first 3 are administrators)
- Remove the battery cover, short press ‘set’ (back panel) or long press ‘*’, then the voice prompts: ‘Please add administrator’.
- Add administrator’s fingerprint(3 times), card, or password (6-8 numbers) ended with ‘#’ (the same password, 2 times).
- The voice prompts: ‘add successfully’.
- Then you can continue to add.
Notes:
- The different position fingerprints can be added to improve the fingerprint identification rate.
- ‘*’: Back, Sign out button, ‘#’: Confirm button.
Add the User
- Remove the battery cover, short press ‘Set’ (back panel) or long press ‘*’, then the voice prompts: ‘Please verify administrator’
- Verify the administrator
- Add user’s fingerprint (3 times), card, or password (6-8 numbers) ended with ‘#’ (the same password, 2 times).
- The voice prompts: ‘Add successfully”.
- Then you can continue to add.
Delete the User
- Remove the battery cover, short press ‘Set’ (back panel) or long press ‘*’, then the voice prompts: ‘Please verify the administrator’.
- Verify the administrator
- Short press Set (back panel) or long press ‘*’ again.
- Press ‘1’ to remove all user fingerprints, press ‘2’ to remove all user passwords, press ‘3’ to remove all user cards, press ‘4’ to remove all users.
- The voice prompts ‘successful’.
Note: The administrator can’t be remove by doing this.
Reset The Lock
- Remove the battery cover, long press ‘Set’ for 3 seconds.
- The system restore to the factory default settings.
Notes:
- After the reset, all the information are removed (including administrator).
- The password will retum to its default ‘1234567890’.
- Please add a new administrator immediately.
APP Installation And Network Configuration
- Search ‘TuyaSmart· in APP store, download APP.
Android Download
iPhone Download - Install and open APP, register and login with the mobile phone number.
- APP: Press ‘My Family’ / ‘Add Device’ / ‘All Devices’ / ‘Lock’ / ‘Confirm the indicator rapidly blink’, then select WiFi network, enter WiFi password.
- Short press ‘3’ + ‘#’ of the lock, Verify the administrator.
- Network configuration: the LED of ‘8’ fast flash, please add network In APP.
- Refer to the operation prompt to complete the network configuration of APP.
- Add successfully: The voice prompts ‘add successfully’.
- Add failure: LED light show ‘X’ and the voice prompts ‘add failure’, please try again.
Notes:
- This APP supports only 2.4Ghz WiFi network.
- The WiFi connected to the APP and mobile phone should be stay in same.
- Make sure one of the administrators is a password.
- The remote to open the door:
a. Press ‘4’ and ‘#’ to activate in the lock.
b. Press the icon of ‘Click open remotely’, when it flash.
Self-locking
If the password is entered wrong for 5 times continuously, the system will be locked for 180 seconds, and the fingerprint or card unlock can remove self-locking.
If the fingerprint is entered wrong for 8 times continuously, the system will be locked for 180 seconds, and the card unlock can remove self-locking.
Low Power Warning
When the batter power is lower than 4.8V, the lock will prompt ‘The battery is use up, please replace it’, please replace with 4 new batteries in time.
Virtual Password
Enter virtual password before or altar the real password, it can be unlocked.
Volume Adjustment: Press ‘3’ ‘3’ ‘3’ ‘#’ to switch (Mute, Low, Medium, High).
Door Bell: Press’#’ in LED off state.
If you are looking to install your lock, visit here.
If you are looking for instructions on how to replace the batteries, visit here.
Get the Tuya Smart Lock App on your phone:
For Android, click here.
For iPone, click here.