

Installation Guide
Looking to install your YEEVV S1 lock onto your door? This guide will break down the steps.
If you are looking to program/setup your lock, visit here.
If you are looking for instructions on how to replace the batteries, visit here.
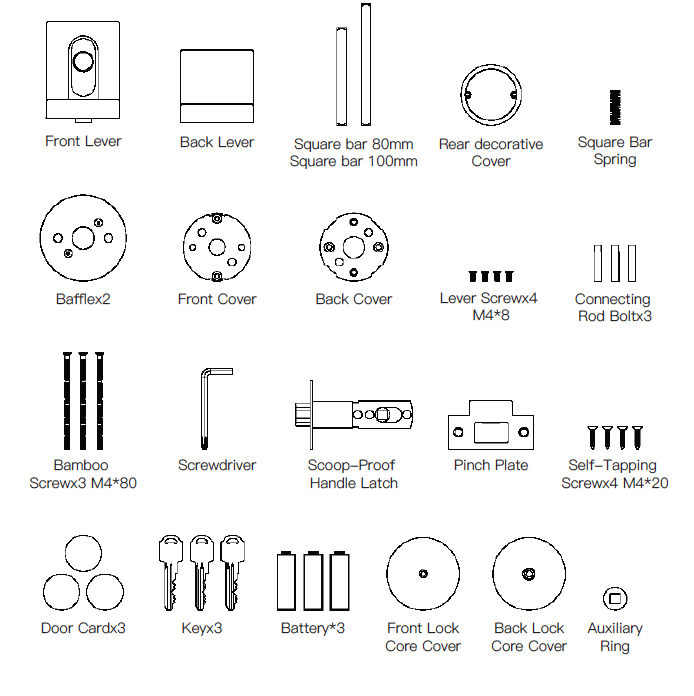
Product Accessories Diagram
Installation Intro
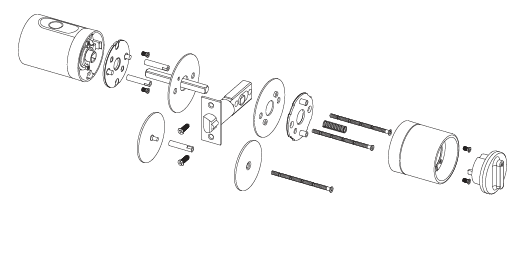
Installation Steps
- Door Hole Prep
1) After confirming that both the outside and inside of the doorof the original lock are both upper and lower panels, remove the original latch bolt lock body.
PS: After the installation, the deadbolt in picture one has no further use, you can choose whether to use the front and rear decorative covers to cover or not.
2) Confirm the door thickness and door hole size meet the following parameters. - Install the plate
This step is only for new doors or doors need to be reinstalled.
(PS: The direction of the gusset plate should be face to the slope of the lock tongue.) - Install the front handle
Assemble the front cover: fix the bolt on the front cover and tighten with the handle screw M4 * 8; - Install the lock body
- Install the front handle
1) Align the screw of the front handle with the round hole on the lock body and install it on the door.(Be aware that the fingerprint side is facing upwards, choose whether to use the front baffle according to the size of the door hole.)
2) Install the back baffle
(Cut the bamboo screws according to the door thickness , be aware that the length of the screw should be less than 10mm of the door.
according to the size of the door hole, choose whether to use the back baffle according to the size of the door , the bolt should be face outward.)
3) Install the square pole and test
Select the square pole inserted into the square hole of the front handle, put on the auxiliary ring, and check whether the square pole rotates flexibly. - Back handle installation
1) Install the square rod spring into the center hole of the back handle.
2)Remove the lock knob cover of the back handle and fix the back handle to the door with screws.
3)Select the lock knob cover or back decoration cover for installation according to the requirements. - Install the battery
1) Remove the battery cover, install three AAA batteries, tighten the screws after installing the battery cover.
2) Install the cover. - Install the front and back decorative cover
PS: Based on your needs.
1) Assembling the front decorative cover
2) Cut the bamboo screws according to the door thickness , be aware that the length of the screw should be less than 10mm of the door.
3)Assembling the back decorative cover. - Testing Operation
Remove the cover, insert the key and turn 90 degrees, then try the front and back handle in turn, and check the movement of the lock tongue. If the operation is not smooth, please check again all installation steps.
Congratulations, you have successfully installed the Yeeuu S1 Smart Lock!
If you are looking to program/setup your lock, visit here.
If you are looking for instructions on how to replace the batteries, visit here.